javascript:void(0)

Monday, November 15, 2010

Construction -- Day 1

Today is the day.  After a couple months of planning, we are finally starting our big kitchen remodeling project.  No, we aren't attempting to do it ourselves.  Trust me, that would NOT be a pretty sight.   Our kitchen was remodeled about 20 years ago with cheaply made veneer-covered particle board cabinets, 70's style Formica countertops, and a cheap linoleum floor that attracts and locks in dirt.  The veneer is peeling off, the drawers and cabinets are broken, and the mottled floor is way beyond cleaning or repair.  And don't even get me started on the broken light fixtures, green mini blinds and chipping paint.  Yes, it's definitely time for a makeover.

This is what our kitchen looked like this morning:


Ba-bye, old kitchen! Today was demolition day, so a nice man came to our house with a hammer, a crow bar and some other manly type tools.  I think a screw driver was also involved, though I try not to get too involved with all that technical stuff.

I couldn't bear to watch, so I stayed in the other room with the door closed while that nice man did unspeakable things to our cabinets and counters.  After lots of hammering and loud noises, our cabinets and counters went POOF!  All gone!  Then that nice man hauled them away in the back of his van.  This is what our kitchen looks like right now:
Oooooooooooh, it's not pretty.   But take a look at these old black and white checkered tiles that were hiding under our cabinets.  And underneath these old tiles is some OLD yellow and green flooring that has probably been there for decades.
The demolition also revealed some old wallpaper and pea green paint on the walls (Hello 1970's!!).    Our house is 80+ years old, so there was a lot of history here before my husband bought this house about 20 years ago. I found myself standing in the kitchen and staring at all these old bits of history, and I wondered what life was like for the families who lived here before us.  And as much as I hated our yucky old kitchen, it does hold a lot of wonderful memories for our family.  It's the sink where I bathed my girls when they were babies, the stove where I cooked countless family dinners (and burned quite a few too), and the floors on which my girls first crawled and then took their first steps.  I will hold these memories dear, but I'm looking forward to creating new memories in our new kitchen.

Wish us luck with the rest of our renovation project!!!

Friday, November 12, 2010

Busy week!

Whew, what a busy week it's been!  So much happening in the past week:
  • Last minute planning, research and running around for a big house renovation project starting on Monday.
  • My hubby's birthday on Tuesday -- Happy Birthday HHF (Handsome Husband Face)!
  • My daughter's birthday yesterday, which involved three parties over the past week (friends, school and family).  Happy Birthday, sweet girl!
  • Hours of packing up stuff from my kitchen and scraproom in anticipation of the above-mentioned renovation (I still have a lot more stuff to pack up and move out before Monday).
  • Chaperoning a school field trip on Wednesday.
  • Daily work (my day job as an insurance agent).
  • Scrapbooking assignments.
  • My dad just had hip surgery (it went well, yay!), so I'm off to the hospital today to spend time with him.
And I've been waking up at 5:00am every morning thinking about all the things I need to do, so I'm totally sleep deprived.  Ahhhhhhhhhhhh, Calgon take me away!!   Hopefully next week will be a little calmer.

On another note, THANK YOU for all the sweet comments regarding my new CK Dream Team gig.  I've been so busy that I haven't had a chance to respond or go back and blog hop.  But I really appreciate all your kind words!   Here are a couple recent CK layouts:

As seen in the October 2010 issue of Creating Keepsakes magazine. Copyright Creative Crafts Group. Posted with prior permission from the publisher. 

I used Lily Bee papers and Shimmerz paint (on the paper curls) on this layout:
As seen in the October 2010 issue of Creating Keepsakes magazine. Copyright Creative Crafts Group. Posted with prior permission from the publisher. 

Speaking of Lily Bee, there's a great warehouse sale going on.  You can check it out here:  Lily Bee Warehouse Sale

Have a wonderful weekend!

Thursday, November 4, 2010

Creating Keepsakes 2011 Dream Team

I can finally shout it from the rooftops . . . the 2011 Creating Keepsakes Dream Team has been announced, and my name is on the list! Working with the fabulous editors at CK has always been a joy (those ladies are the best!), and I'm very excited to be doing it in a more official capacity for the next year. 

Check out the 2011 Creating Keepsakes Dream Team members:

Stacy Cohen  -- that's me, that's me!!!

And the 2011 Creating Keepsakes Contributing Writers:


I'm honored to be working with such a talented group of ladies!! THANK YOU Creating Keepsakes for this amazing opportunity!! I'm a happy, happy girl!

Tuesday, November 2, 2010

I've been a bad blogger . . .

Shame on me . . . I've neglected my blog over the past week.  I've been a busy little bee.  We're starting a much-needed home renovation project in a couple weeks, so I've been running all over town trying to pick out materials.  And because I'm a very indecisive person (the understatement of the year), I tend to spend many hours (days, actually) researching every little decision.   Then I usually change my mind a few times before settling on my final choice.  But the good news is that once I make a decision, I'm always happy with it and I rarely look back.

My indecisiveness is the main reason why it takes me at least 2 or 3 nights to finish a single scrapbook page.   Should I use this paper or that one?  Should the flowers go here or there?  What color letters would look good?  You get the picture.

Here's a layout I created for the Shimmerz booth at CHA this past summer (yes, I'm behind on posting my stuff here).


I made the decorative background pattern by using a sheet of die-cut KI Memories paper as a mask with Razzle Dazzle Shimmerz Vibez:

I found the embroidered tulip applique at an estate sale. It was originally white, so I colored the petals with Pink Shimmerz and the stems with Peas-Be-Mine Pearlz.

I used a variety of Shimmerz products -- Sea Foam Spritz, Sea Monkey Spritz, and Wintergreen and Tickle Me Turquoise Shimmerz paint to color the flowers, which were cut from Glitz patterned paper.  I made the fabric flower and colored it with the new Pop Art Pink Vibez and Ruby Spritz. 


On another note, I'll have some very exciting news to share in a couple of days!  I've been bursting at the seams trying to keep this secret hush - hush, but soon I'll be able to shout it from the rooftops.  Stay tuned!

Friday, October 22, 2010

Two Peas Guest Blogger!

I'm so honored to be the Guest Blogger on 2 Peas today!!! I was asked to create a Halloween layout for the Two Peas in a Bucket SpookCraftular Halloween event.  From my blog post at 2Peas:

From the time they were toddlers, my girls always wanted to dress up as princesses for Halloween. Sure, there were the standard pumpkin and Elmo costumes that I proudly dressed them in when they were babies, but they didn’t have much say in it at the time. Since then it’s been a parade of various princess costumes every Halloween – Cinderella, Ariel, Snow White . . . . well, you know the rest. Last Halloween my girls decided that they were “over” princesses (when did that happen and why didn’t I get the memo??). After talking about all the costume options and changing their minds several times (it is a woman’s prerogative, right?), my girls both decided that they wanted to be High School Musical cheerleaders. I thought they looked adorable in their shiny, sparkly costumes, and it was fun to watch them as they danced around and cheered with their pom-poms. But I have to admit, I still miss the princess phase. Ce La Vie.

Here’s a Halloween layout featuring my little cheerleaders from last year. As the girls’ candy-filled pumpkins got heavier and heavier while trick-or-treating, my husband and I ended up holding their pom-poms for them. Isn’t that the way it always happens . . . they get the candy and the parents get stuck holding the pom-poms.

I used papers from Lily Bee's new Catching Fall line.

I added a Prima Lilliput rose and some fabric rosettes I made:
To make these fabric rosettes, I first cut long strips of white muslin fabric. To get smooth edges without any loose threads, I folded both edges (lengthwise) in towards the center of the strip, and then I adhered the fabric in place with fabric glue (Fabri-tac). Starting at one end of the fabric strip, I rolled the fabric around itself to create a spiral, twisting and turning the fabric strip as I went along. I added a dab of Fabri-Tac every so often to keep the fabric in place. Once the fabric was all rolled up and secured in place, I colored the rosette with Licorice Shimmerz Spritz and Espresso Shimmerz paint.

I also created a sketch to go along with this layout.  Feel free to use it!

Go check out the Two Peas SpookCraftuler Halloween event where you can find some great projects, lessons and challenges. 

Have a great weekend!

Friday, October 15, 2010

Prima Friday

Here are a couple Prima projects I did recently.  Playing with Prima's beautiful papers, flowers and crystals always makes me happy!  This layout is based on the October Build-a-Page:

The papers are from Prima's Paisley Road collection.  To get the pearlescent color and shine on the edge of the pink patterned paper, I added some drops of Ranger's Perfect Pearls and rubbed it around with my fingers.  I love getting my fingers messy when I'm scrapping!  It makes me feel like I'm a real "artiste" . . . LOL! 
 
Here's a card I made last week for World Card Making Day.  I used papers from Prima's So Cute collection to make a little patchwork design.


People have asked me what kind of thread I use when I machine stitch on my projects because the thread  shows up very well.   My "go to" thread for stitching on layouts and cards is Guterman Top Stitch Heavy Duty Thread (I buy it at Joann's).  I love it because it's thicker than regular thread so it stands out better on paper. Of course I also love to hand stitch on my layouts with embroidery floss.

Have a fabulous weekend!!

Tuesday, October 12, 2010

Lily Bee Layout and Creating Keepsakes Special Issue Winner

First of all, I have a Lily Bee layout to share today.  I finally got to play with the beautiful new Catching Fall line.  It's so perfect for family pages!  


Have I mentioned how much I love the Lily Bee rub-ons?  The Catching Fall rub-ons include many great sentiments, including one of my favorite quotes by Anthony Brandt:  'Other things may change us, but we begin and end with family.'  I wanted the photo and this great quote to be the focal point of the page, so I went with a clean and simple design (well, clean and simple compared to most of my pages, which tend to have a lot of "stuff" on them).   Maya Road was kind enough to send the Lily Bee gals some goodies to play with, so I added a few of these adorable embellishments to this page.

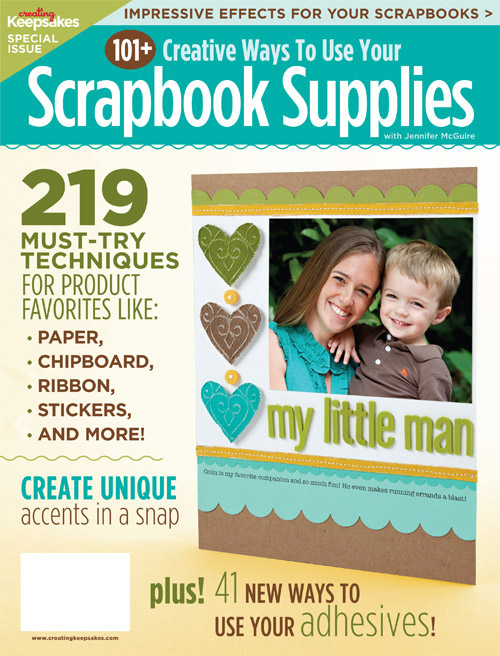
And without further ado . . . WINNER, WINNER, CHICKEN DINNER . . . it's time to announce the lucky winner of Creating Keepsakes' new special issue:  101+ Creative Ways to Use Your Scrapbook Supplies:


I used a random number generator and it picked comment number 6, which was posted by . . . drumroll please . . . 
Karen G.!  (www.karenika.com)   
Congrats, Karen!  You're going to love this special issue.  I'll email you to get your address.  Thanks everyone for playing along!!

Friday, October 8, 2010

My Creative Scrapbook - two more kit layouts . . .

I have a couple more My Creative Scrapbook kit layouts to share . . . 

There's a great vintage flea market every Sunday close to my house, and I love to hunt for treasures there. After seeing these Crate Paper Restoration papers and die-cuts, I new I wanted to do a layout with pictures from the flea market.  So I made a trip to the flea market for the sole purpose of snapping some photos for my page.  In between snapping photos I just happened to find a few little vintage goodies that I "needed" to buy for my scrap stash . . . . hehehehehe.


I used a CoffeeShop Action in Photoshop to give the photos a vintage look and then I added a Holly McCaig digital border to each of them.

See the little picture of the suitcase on the top right? That suitcase was filled with lovely vintage linens.  I bought a couple of  oversized napkins (small tablecloths?) with a beautiful, detailed hand-crocheted trim around the edge . . . perfect for future scrapbook pages and other crafty projects. 


Here's another layout I did with the fabulous kit.  One thing I love about these Restoration papers is that there are so many pretty flowers and spirals to cut out.


I used the tab from the Prima flower packaging to make a pull-out tab for my journaling  -- a little handwritten love note to my daughter with bits of "motherly advice" from me.  Sometimes I feel more free to write and express my feelings when I know the journaling will be hidden.

It's been wonderful being a guest DT member at My Creative Scrapbook this month!  Pam and her uber-talented  Design Team girls have been so warm and welcoming.  And as you can see, the kit I got to play with is FULL of beautiful products.  Thank you, Pam, for having me as your guest this month!!

Wednesday, October 6, 2010

'My Creative Scrapbook' - Guest DT Work

As I mentioned in an earlier post, I'm so happy to be a Guest Design Team member at My Creative Scrapbook  this month!  I got to play with the beautiful October Main Kit, and let me tell you that this is one beautiful kit.  It's filled with Crate Paper's Restoration line, two -- count 'em two -- full packs of Prima flowers (no, I can never get enough of them!), and some other perfectly coordinated goodies.   Here are a couple of the layouts I created.  This first layout features a picture of my mom with her family when she was a teenager.


  I couldn't resist adding a little crocheting around the photo:
 

One thing I love about the Crate Paper Restoration papers is that there are so many pretty flowers and spirals to cut out.  I cut out a lot of the flowers and used them on this layout:
 

Paper curling:
I'll be posting the rest of my kit layouts in the next day or so. 

If you haven't already done so, be sure and leave a comment on the post below for a chance to win a copy of Creating Keepsakes' fantastic new idea book, 101+ Creative Ways to Use Your Scrapbook Supplies:

Have a great day!

Tuesday, October 5, 2010

101+ Creative Ways to Use Your Scrapbook Supplies + a Giveaway!

Creating Keepsakes has a new special issue out:  101+ Creative Ways to Use Your Scrapbook Supplies.

This special issue is chock full of great ideas. It features inspiring ideas from Creating Keepsakes columnist Jennifer McGuire and a team of talented scrapbookers. They will show you how to go beyond the basics to use your supplies in new ways to create unique page accents, backgrounds and more. With budget-saving tips, easy techniques, ideas for leftovers and more, the useful ideas in this issue will help you stretch your dollars and make the most of your supplies. 
I was honored to be asked to contribute a few projects to this special issue. Here's a peak at one of them:

I've already received my copy of this issue, and I can tell you that it's FANTASTIC!!  You can purchase it here:  101+ Creative Ways to Use Your Scrapbook Supplies.  Use code FS101B to get free shipping on orders of $25 or more, now through December 31, 2010.  You can also find this issue on newstands.

And now for the giveaway!  Creating Keepsakes is allowing me to give away a copy of this special issue to one of my blog readers.  Just leave a comment here from now until the end of the day on Saturday, October 8th and I'll draw the name of the lucky winner. I'll post the winner next week!

Friday, October 1, 2010

Happy Friday!

I'm blogging right now so I can put off doing the inevitable . . . cleaning the huge MESS in my scrap room.  I could swear that I had a scrap table in there somewhere, but there's so much stuff piled up  that I can't even see it!  I've been scrapping non-stop for the last couple of weeks, so things have been piling up . . . and piling . . . and piling.

I'm still trying to play catch up posting layouts I've done during the past few months.   Here's one I made for the Prima booth at CHA.  I cut off part of the 12 x 12 paper because I wanted the circle and photo to hang over the edge . . . as if the girls are running off into the floating ocean.


I used Prima's Jack and Jill line and some of the other new products.

On another note, I'm THRILLED to be a Guest Designer for My Creative Scrapbook this month!   The kits are absolutely gorgeous!  I got to play with the Main Kit this month, and I loved every single thing in it.   Here are some sneak peaks of my layouts.


The October kits will be revealed on My Creative Scrapbook on the 5th, and after that I'll be posting my full layouts here.

Monday, September 27, 2010

Happy Monday!

I've been having so much fun playing with the beautiful and adorable Dusty Attic chippy pieces as part of my Guest Designer stint with them this month.  Here's a layout I created using Dusty Attic chipboard mini houses, an ornate frame, and a mini word ("family").

Have I mentioned how much I love these chipboard products?  They are so versatile -- you can paint them, ink them, chalk them, spray them, or just leave them as is!   I painted the ornate frame with Shimmerz paint, and I inked the word "family".  I painted the chipboard houses with acrlyic paint then coated them with Glossy Accents. 

I crocheted around the edge of the paper to give this family page a homespun feel.   I found some great vintage crocheted  doiles at an estate sale recently, and I've been having fun dying them different colors with Shimmerz Spritz and Vibez:
I made a little puffy heart to go over the Dusty Attic chipboard title:

That's it for today, but I still have lots of other layouts to share.  Have a great Monday!!!

Wednesday, September 22, 2010

Up, Up & Away

I admit it . . . sometimes I plan events and clothing around my scrapbook page ideas. I might get some beautiful new paper and think, "hmmmmmmm, the girls' new dresses would look perfect with those colors," and then I'll have them wear the dresses for an impromptu photo shoot.   That's what happened when I received Prima's fun new travel-themed Road Trip line.  We had scheduled our annual "girls only" vacation (just me, my mom and my girls) to San Francisco a couple weeks after that, and I knew that I'd have an opportunity to take some airplane photos.  Since the colors in this line are green, blue and brown, I "encouraged" my girls to wear matching colors for the plane ride.  Okay, okay, maybe I did more than encourage them.  I think there might have been some gently coercion and bribing involved. :)

 This layout was based on Prima's September Build-a-Page.  Here's a close-up.  See how their shirts and pants match the papers and lace perfectly?  Hehehehehehe.

I'm very honored because this layout was selected as the Featured Project of the day on 2Peas today!!

Thank you, 2Peas!

Monday, September 20, 2010

Grandparents

Happy Monday everyone!  I have a few layouts to share today.  The first two layouts were part of an article entitled the "Lighter Side of Grandparenting" in the September issue of Creating Keepsakes magazine.  I have wonderful parents in my life:   my mom and stepfather and my dad and stepmother.  They are all good friends, and that makes for a nice, big happy family.  I'm very fortunate that they all live close-by and that they are very involved in my girls' lives.   We are very blessed!

My dad is such a fun-loving guy who would do anything  for his grandchildren.  This layout shows pictures of my daughter, Rebecca, painting his fingernails at a "day of beauty" party.  What sport!   A little while after that he let Danielle put eyeshadow and blush on him (I'm saving those priceless pictures for another layout).

Here is my mom giving my girls a little sewing lesson:

Last but not least, this layout was in the "Back to School in Style" feature.  I used a real wooden ruler and a Number 2 pencil on this page:
As seen in the September 2010 issue of Creating Keepsakes magazine. Copyright Creative Crafts Group. Posted with prior permission from the publisher. 

Have a fantastic week!!

Thursday, September 16, 2010

Fixed! {I hope}

If you happened to see my blog post about an hour ago, you know that I was in tears because I had managed to delete ALL my blog settings, including the headers, background, fonts, widgets . . . everything!!!  I've spent a good part of the day dealing with this, and luckily I've gotten the main elements back to the way they were.  It all started a couple days ago when I tried to get help adjusting the margins slightly, but those changes made my blog look wonky, so I tried to go back to the way I had it in the first place.   Then  "POOF" . . . all gone.  I should have left well enough alone, because even though I have the main settings back, my margins are more scrunched now -- worse than the way I had it before.  It's been a very frustrating few hours dealing with this.  Now I need to go eat a cookie and scrap for a while. Scrapping is always my best medicine!!

So that you haven't completely wasted YOUR time coming here today, here's a Lily Bee layout to share. 


To create the background, I did a little masking technique using the Lily Bee chipboard stickers and Shimmerz Vibez. I simply placed the chipboard stickers on a sheet of cardstock (without removing the protective sticker backing), then I sprayed over the chipboard pieces with Shimmerz Red-Y Or Not Vibez. 

After I removed the chipboard stickers, I outlined the shapes with Stickles for a little extra definition.
I colored the lace doily with Blue Jeans Vibez.   And see those little leaves?  I made them out of really cool air dry modeling compound called Delight.  The modeling compound is white, and you can either mix paint in before it dries or paint it afterward.   For these leaves I chose to paint them with Shimmerz paint after they were dry.


Now I'm going to step.away.from.the.computer. Argggggh!!!