My share for the day . . . a layout using Shimmerz Vibez and paint:
It's fun to see the different effects you can get by using Shimmerz products on different types of paper. For the background on this layout, I started with a sheet of kraft cardstock and cut out a decorative shape, then I sprayed it with Hermit the Frog Vibez. I love how the Kraft cardstock absorbs the Vibez color. It almost makes the cardstock look like soft suede or velvet, don't ya think? I used Tickle-Me-Turquoise Shimmerz on the chipboard alphas. For the patchwork I used scraps of fabric. And of course no layout would be complete without some Prima goodies.
Today is my oldest daughter's 8th birthday. Seriously? I'm saying this in the same intonation as my now 8-going-on-15-year-old daughter would say it (with a little bit of teen-like attitude thrown in): SERIOUSLY?? Where in the world does the time go?? This morning as we were standing side-by-side in front of the bathroom mirror getting ready together (I swear she grew another inch last night while she slept!), I remembered our morning routine when she was a little baby . . . I used to set up a soft blanket and baby toys on the bathroom rug next to me, and she would happily play alongside me while I got ready. Time flies! Before I know it she'll be off to college. *sigh* In any event, it's shaping up to be a nice birthday for her. We made her breakfast in bed, and then I'm bringing donuts to school for her class birthday celebration. We'll have a nice birthday dinner tonight, and then I need to start preparing myself for her slumber party this coming weekend. Happy Birthday, my sweet girl!
I added some Prima flowers and colored them with Shimmerz paint and Spritz.
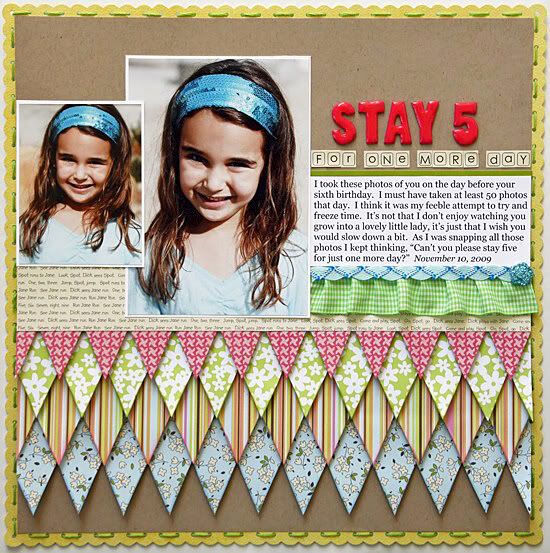
This next layout features pictures of my younger daughter on the day before her 6th birthday last year:
The journaling on this "Stay 5" layout says: I took these photos of you on the day before your sixth birthday. I must have taken at least 50 photos that day. I think it was my feeble attempt to try and freeze time. It’s not that I don’t enjoy watching you grow into a lovely little lady, it’s just that I wish you would slow down a bit. As I was snapping all those photos I kept thinking, “Can’t you please stay five for just one more day?”
This last one was based on the monthly sketch created by the very talented Rachel Hall:
I've been playing with my AMM March kit this past week. Here's a little mini album I made with the Maya Road chipboard album that comes with the kit. It's so TINY! I love how it fits in the palm of your hand.
This mini album features pictures of our family photos from 2005 to 2009.
The last three photos (from 2007 to 2009) were taken by a fantastic photographer here in Los Angeles, Melissa Walker-Scott.
I made this for my husband for our anniversary next week, so I had to keep it hidden from him while I was working on it. And Robert, if you decided to pop on my blog this week, then you've discovered my little anniversary surprise for you. Darn it! Well, I hope you like it! Mwah!! Happy "saversy" (that's a word my hubby and I made up).
I'm so excited . . . I made the new Lily Bee Design Team!! I just ADORE Lily Bee's gorgeous collections so I'm over the moon!. Thank you so much, Kristen! And look at this amazing team: Lily Bee Design Team. I'm honored to be working with such an incredibly talented group of girls!
Here's one of my Lily Bee layouts that was just published in the February issue of Creating Keepsakes:
I fell in love with Lily's Bee's newest collections at CHA. Such a gorgeous mix of colors and patterns. I can't wait to get started!!
I haven't blogged much lately because I've been busy working on some things that I can't post yet, so I thought I'd share a simple little tutorial I put together for A Million Memories last May.
Materials needed:
-velvet ribbon or fabric
-needle and thread
-embellishments for the center of the pinwheel (optional)
Start with a piece of velvet ribbon. For this example, I used velvet ribbon that was about 3/4 of an inch wide and I cut a piece that was about 6 inches long. The length you’ll need will depend on the width of the velvet and how tight you want your spiral to be.
1.Take the threaded needle and stitch along one edge of the velvet:
2. After you’ve stitched along the entire edge of the ribbon (see the photo above), pull your thread to gather the velvet:
3. Keep pulling the thread until the entire edge of the velvet is gathered as tight as it will go. The gathered velvet will form a little pinwheel (see below). Just stitch up the loose ends and tie a knot in the thread:
You can also use velvet fabric, but you’ll probably want to cut it along the edge of the fabric so that you have a crisp edge (just stitch along the edge you’ve cut).
Once you’ve finished the pinwheel, you can add anything you want to the center – rhinestones, pearls, buttons, a dab of Stickles, flowers, etc. And there you go!!