Ahhhhhh . . . sweet summer!! I really love this time of year. The kids are out of school, we get to sleep in, and life feels a little less stressful than normal. I'm on a laid back summer schedule and I'm definitely taking some time to relax and smell the roses (and sunscreen!). I guess that's why I haven't blogged in a couple weeks.
I realized that I forgot to post one of the layouts that I made with the fabulous
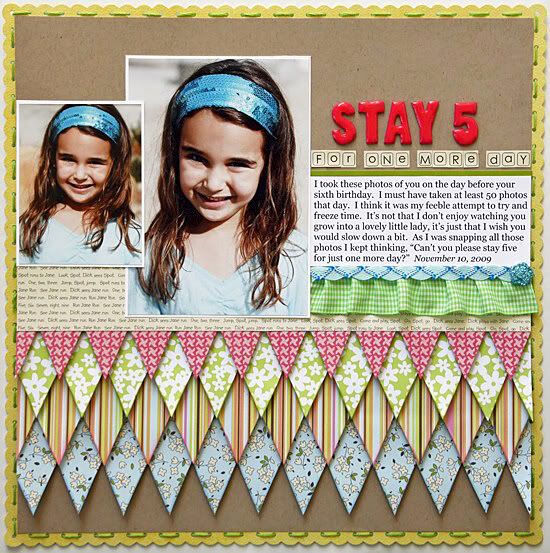
My Creative Scrapbook June LE kit. It features paper and die-cuts from Crate Paper's DIY Shop collection.
I created a tutorial showing how I made the layered patterned paper
waves on this layout.
1. Cut a piece of
cardstock that is the approximate size you want your wavy paper block to
be. I cut mine to 7” wide because I
wanted it to align with the edges of my 5” x 7” photo.
Grab a pencil and a flexible ruler (if you have one).
2. Draw horizontal
curvy lines from top to bottom.
Note: You don’t need a flexible
ruler to draw the curvy lines; you can easily freehand draw them.
3.
Cut along the
curvy lines.
These pieces will be your
cutting templates.
It helps to number
them so that you can choose the order of the patterned paper pieces to cut.

4. Use the wavy
sections as templates to trace and cut the curvy sections from patterned
paper. This is a great way to use up
your scraps!!
5. Once you’ve traced
and cut all the curvy sections, you can ink or stitch the edges, if desired.
6. Cut another piece
of cardstock the same width as the first piece you cut and use it as the base
for the wavy paper pieces. Adhere the
wavy paper pieces to the cardstock starting from top to bottom, slightly
overlapping each piece. Cut off any
excess cardstock on the bottom. You can
always go back and add some more wavy layers if you want to make your paper
block taller.
And VOILA!
I handstitched along the edges of my curves. And of course I had to add some pretty flowers.
I hope you enjoyed this scrapbooking tutorial!


 2. Use one as a base or frame for your title:


 Check out the A Million Memories design team gallery and see the other ways the talented ladies used these cute frames!!