javascript:void(0)

Wednesday, December 28, 2011

Hanukkah stories and a couple more layouts

Hanukkah has come to an end.  We had eight fun-filled nights of family dinners, present-opening, candle-lighting, latke-eating and dreidel-spinning.  My girls said it was the "best Hanukkah ever."  That makes a mom happy!

My husband and I have a fun tradition that we started years ago.  Rather than buy each other big gifts for Hanukkah, we challenge each other to buy eight little gifts (one for each night of Hanukkah) -- and all of them have to be purchased at the 99¢ Only Store.  It's always a fun challenge to find gifts for each other that cost under a dollar.  Some of them are practical, some are meaningful, and others are just downright funny!

This year I bought Robert the following:
1.  A picture frame.  I put our family picture in it.
2.  A set of mini screwdrivers.  A guy can never have too many mini screwdrivers, right?  Plus I needed them for one of my recent craft projects.
3.  A box of Junior Mints (his favorite candy).
4.  A multi-pack of his favorite chewing gum.
5.  A book about science facts.
6.  A Springer Spaniel puppy calendar.  He had two beloved Springer Spaniels who have gone on to doggie heaven.
7.  A nose hair trimmer (hehehehehe).
8.  A combination flash light, level, and drill bits/screwdriver doo-hicky thingy (cool, huh?).

Robert bought me:
1.  A kitten calendar.  I love cats, so this was my favorite gift.
2.  A book light for late night reading 
3.  A multi-pack of purse-size kleenex packs.  My grandma always told me, a "lady" should always carry tissues in her purse. 
4.  A shower cap***
5.  A pair of wine glasses.  Surprisingly, they're very nice quality!  I think I'll go back to the 99¢ Store and get more of these wine glasses to complete the set.
6.  A jigsaw puzzle.  It has 500 pieces.  That should keep me busy for a while.
7.  A fly swatter.  Huh??? Because a girl can never have too many fly swatters??
8.  A necklace.  Actually, I bought this gift for myself at a local gift shop.  Halfway through Hanukkah Robert realized that he only got me 7 instead of 8 presents at the 99 Cents Store, so I volunteered to go pick up a little sumpin' sumpin' for myself to open on the last night of Hanukkah.  Very thoughtful of me, huh?

We always have a lot of laughs over our 99¢ Only Store gift exchange, and it doesn't break the bank!

***The shower cap was a reference to a laugh my family shared on our trip to Disneyland a few months ago.  The four of us went on Splash Mountain our first day there, and we all got soaked.  It was so much fun so I said I wanted to go on it again the next day.  Robert and the girls said they would go on it again, but only if I would sit in front -- the seat that gets the wettest.  I happily agreed . . . but I had planned ahead.   When I sat down in the front of the log with my family behind me,  I pulled out a plastic shower cap from the hotel and put it on.  There were a couple dozen people looking on, so it totally embarrassed my daughters -- something that gives me a twisted pleasure {insert evil laughter}.  I wore the shower cap the entire ride, but the rest of me still got completely soaked. If you've been on the ride, you know that no dinkie little shower cap isn't going to keep you dry.  But I digress . . .

Here are a couple more Hanukkah layouts I created for Creating Keepsakes magazine.  Here's a 2-pager featuring my girls opening their presents:

As seen in the December 2011 issue of Creating Keepsakes.  Copyright Creative Crafts Group.  Posted with prior permission from the publisher. 
 
I made the little presents and gift bags out of chipboard pieces, paper scraps and trim:

I had the pleasure of playing with Faber-Castell products on this layout:

As seen in the December 2011 issue of Creating Keepsakes.  Copyright Creative Crafts Group.  Posted with prior permission from the publisher.

I hope you all had a wonderful Christmas, Hanukkah, Kwanza, Winter Solstice and/or any other holiday you celebrated recently!!

Tuesday, December 20, 2011

Oh Hanukkah, Oh Hanukkah, Come Light the Menorah...

Hanukkah begins tonight at sundown, so that means 8 fun nights of celebrating at our house.  In honor of the holiday, I wrote a post for the Creating Keepsakes blog today.  I'll also share my projects here.  

Hanukkah is filled with many wonderful traditions:  lighting the candles, playing dreidel, eating latkes, and opening presents.  This means that there are a lot of photo opportunities.  Check out these Hanukkah Photo Tips to make the most of these opportunities.

Taking pictures of the menorah indoors at night can be somewhat tricky.  I often end up with some “clunkers” – photos with poor lighting, distracting backgrounds, or unattractive shadows on people’s faces.  Sometimes photo editing software can provide the perfect fix.  For example, I had a photo of my daughter gazing at the menorah, but the photo had a harsh yellow cast and unflattering shadows.  My solution was to use a selective color technique.  Using Photoshop Elements, I converted the photo to black and white and then colorized only the menorah.  Problem solved!   I used the color-selected photo on this layout:

As seen in the Scrapbooking Holidays and Celebrations 2011 special issue. Copyright Creative Crafts Group.  Posted with prior permission from the publisher.

Although there are many Christmas scrapbooking papers and embellishments on the market, there aren’t as many Hanukkah and Jewish scrapbooking products.  This year I challenged myself to create a Hanukkah card with paper from a Christmas collection.  I used papers from Prima’s North Country line (Christmas/winter themed) to create this Hanukkah card:


I couldn’t find any large Star of David scrapbook embellishments, so I made my own.  I traced stars (printed from the internet) onto chipboard, cut them out, then covered them with silver glitter glue (Ranger’s Stickles).

Happy Hanukkah and Happy Holidays everyone!

Tuesday, December 13, 2011

Just breathe, just breathe . . .

Just breathe, just breathe . . . it will all get done and everything will work out.  That's what I told myself last night right after I almost worked myself into a anxiety attack.  I don't think I've ever had a real panic or anxiety attack, but I think I came pretty close last night.  I have waaaaaayyyy too much on my plate right now (and for the next month and a half) and too many stressful things being thrown at me at once.  But I know I will get it all done, and everything will work out (as it always does).  I just have to tackle one thing at a time.  My mantra for the next month will be "just say no" . . . to any further social engagements, extra scrapbook pages, holiday parties, school volunteer duties, favors etc.   That's what I need to do in order to maintain my sanity and also save time for my family, sleep and meals.  Breathe in, breathe out. 

To lighten this post, here's a Prima layout I made a little while back.  The title is "Jeune Fille", which in french means "young girl" (to my French blog readers, please correct me if I'm wrong!).


I know the holidays are a busy time for everyone.  Just don't forget to take of yourself!  Eat well, get enough sleep, and say "no" if your plate gets too full!!  It's okay to say no sometimes. :)

Friday, December 9, 2011

Just a quick share . . .

I know I've been a bad blogger lately, but it's been a very busy couple of weeks.  I was in Colorado earlier this week shooting a series of scrapbooking videos for Creating Keepsakes.  It was freezing cold there -- a low of 3 degrees below zero, to be exact.  It was quite a shock to the system for the Southern California girl!!  But I had a lot of fun hanging out with some of the CK gals.

With the holidays and CHA approaching, I anticipate another extremely busy couple of months ahead of me.  So I thought I should come and write a quick post so that my blog doesn't start to collect dust and cobwebs. I know Thanksgiving has come and gone, but here's a layout I did that appears in the current issue of Creating Keepsakes:

As seen in the November/December issue of Creating Keepsakes magazine.  Copyright Creative Crafts Group.  Posted with prior permission from the publisher. 

I used my Cricut (speaking of something that's been gathering dust!) to cut this little turkey, then I dressed the little fella up with feathers, Stickles and a jeweled eye.  Isn't he purty?


Oh wait, I have another Thanksgiving layout to share.  I created this for CK's "Holiday and Celebrations" special issue.  This layout is definitely different from my normal style -- it's a two pager and it's very clean and simple.


As seen in Creating Keepsakes' 2011 Holidays and Celebrations special issue.  Copyright Creative Crafts Group.  Posted with prior permission from the publisher.  

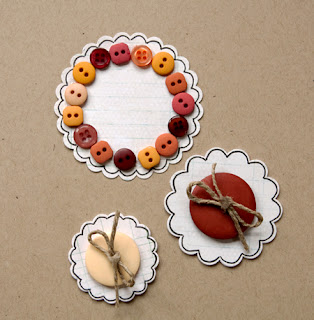
It was for an assignment to use a scallop punch and buttons to create simple page accents.  I made these easy peasy accents:
I guess I'm a little late posting these Thanksgiving layouts, but better late than never, right??  I promise to post my Hanukkah scrapbook pages and projects during Hanukkah.

Have a wonderful weekend! 

Tuesday, November 29, 2011

Here kitty, kitty . . .

If you haven't had a chance to pick up Creating Keepsakes' new special issue: Scrapbooking with Fabric & Notions, you really should!  There are so many great ideas for using fabric, trim and notions on your scrapbook layouts.  Here's a layout I created for the issue.  I used premade appliques and fabric to create the butterfly accents.  The layout features our sweet kitty, Smokey.  He was a stray cat who walked into our house one day.  We sent him on his way, but he kept coming back . . . and the rest is history (read this blog post for the full story).  The journaling says:  I remember the day in November 2010 when this precious little stray cat walked right into our house like he owned the place.  We immediately named him Smokey.  He soon become a beloved member of our family, and now he pretty much does own the place!

As seen in Creating Keepsakes' Fabric & Notions 2011 special issue.  Copyright Creative Crafts Group.  Published with prior permission from the publisher.  The papers are Studio Calico.

I bought two sizes of butterfly appliques from my local fabric shop, traced them onto fabric multiple times each, cut them out, then layered them to create dimensional fabric accents.  I added hooks & eyes and rhinestones to the center of each butterfly.   Here's a close-up:

I can use the appliques again and again as quick shape cutters, or I can use them "as is" on a future page.

Thanks for stopping by!

Tuesday, November 22, 2011

CK giveaway winner + a Prima layout

First off, the winner of Creating Keepsakes' new Scrapbooking Holidays & Celebrations 2011 special issue is . . . . cvanholstein!  Congrats Corina!  I'll contact you for your address. 

Here's another Prima layout I made for the CHA booth last summer.  I used products from the beautiful Romantique collection.


That's my quick post for the day.  Have a great one!

Friday, November 18, 2011

Happy CK News

I'm so happy to share this little bit of news . . .


I've been asked back for another year on the Creating Keepsakes Dream Team.  Being on this team has been such a wonderful experience.  I absolutely love working with CK's fabulous editorial team, my fellow Dream Team members, and the contributing writers.  Seriously, these women are the bestest! I've made some forever-friends, and for that I am most grateful.

Thank you CK for having me back for another year.  I'll try and do you proud!

Thursday, November 17, 2011

Winner of CK Fabric & Notions issue plus ANOTHER CK giveaway!

Sorry for the delay in announcing the winner of CK's new special issue: Fabric & Notions.  The random number generator picked #5, which is the comment left by Jamilie!  Congrats Jamilie!  I just left a comment on your blog with my email address.  Thanks for playing along! 

And the good news is that CK has another special issue out called Scrapbooking Holidays & Celebrations 2011. And yes, I have a copy to give away to one lucky blog reader! Don't be shy.  You're all welcome to throw your name into the hat even if you don't regularly comment here.  Come play along!  Here's a peak at the cover:

Whether your holidays and celebrations are casual get-together or formal events, this special issue from Creating Keepsakes magazine is sure to be a trusted source of scrapbooking inspiration! The gallery of 50 outstanding ideas is a quick source of scrapliftable layouts, and you'll also discover ways to make your relationships shine on your scrapbook pages, photo-taking tips to catch meaningful moments and details of your celebrations, and journaling ideas to capture the points of view of your loved ones. Learn ways to create easy holiday accents and even ideas for storing your holiday-themed supplies. Pick up this issue today for non-stop scrapbooking inspiration for all your celebrations during the upcoming year! 

Here's a little sneak of one of the layouts that I created for this special issue (the 2-pager on the bottom):

To be entered to win a copy of this special issue, just leave a comment here before the end of the day next Monday (November 21st) and tell me your favorite Thanksgiving dish or food.  If you don't celebrate Thanksgiving, just tell me about your favorite main dish at family meal time.  Or better yet, email me the recipe! Heeheheeeeeee.

Saturday, November 12, 2011

Happy Birthday to my sweet little girl!

Happy Birthday to my sweet little daughter! Danielle turned 8 yesterday (where does the time go?!?).  I'm still trying to recover from her slumber party last night.  We had a bunch of VERY rambunctious little girls running all over the house.  It kind of reminded of the frenzied antics of that old cartoon character, the Tasmanian Devil.  Remember him?  He did those tornado spins and left a path of destruction wherever he went. 

I'm kidding.  In actuality, all the girls who came to the party were very sweet and well-behaved.  It was a nice group of girls.  But wooooooooeeeeeee do they have a lot of energy!  Even though it was a "sleepover" party, there wasn't a whole lot of sleeping going on. Nonetheless, a good time was had by all.  Danielle was overjoyed and said it was one of the best birthdays she's ever had. Hearing that makes me a happy Mama!

Here's a Prima layout I made of my sweet Danielle.  It's one I created for the Prima booth at CHA this past summer.  I'm obviously still way behind on posting.  I used puffy paint (the kind you heat with a heat gun) with Prima's cool brick stencil. 


I just adore the white resin pieces and the beautiful rose vines from Prima's Summer release!

To go along with the window theme of the page, I created a recessed window using several layers of paper separated by 3D adhesive . . . kind of like a shadow box.

 
Happy Birthday, my darling girl!!

Now I'm going to go finish getting ready for the workshop I'm teaching at CRAFT Beach Retreat tomorrow.  Are any of you blog readers attending?  If so, I'll see ya then!!

Tuesday, November 8, 2011

Creating Keepsakes Special Issue and a Giveaway!

Creating Keepsakes has a great new special issue out, Scrapbooking with Fabric & Notions, and it's starting to hit stores this week!

Discover how to enhance your scrapbook layouts using buttons, fabric, thread, and other materials from the sewing world. From using quick, pre-made accent options to creating beautifully sewn backgrounds, we'll help you learn the ins and outs of adding homespun textures to your layouts with patterns, step-by-step instructions, and more. You won't want to miss this "sew" special issue from Creating Keepsakes.

Here's a sneak peak of a layout I created for this special issue:

My layout focuses on cross-stitching with ribbon, yarn and embroidery thread.  I'll share more details in the coming weeks.  

As usual, the generous folks at Creating Keepsakes are allowing me to give away a copy of this special issue to one lucky blog winner.  For a chance to win, simply leave a comment here before the end of the day on Sunday.  I'll announce the winner next week, at which time I might just have another special issue to share and giveaway!


Thursday, November 3, 2011

CRAFT Beach Retreat -- single class and day passes now available!

The CRAFT Beach Retreat is only 8 days away, and now you join us for just a single class or one day!  This is perfect for people who are local to Los Angeles and can't get away for the entire three-day event which runs from November 11 - 13.  Here are the options:
  • Single class passes include a fabulous 4 hour deep and meaningful emotion-focused workshop, an eco-friendly tote filled with CRAFTy gifts, a delectable meal catered by Urth Caffe, treats and snacks and a chance to win fun giveaways. $80
  • A full day pass includes all of the above plus an additional 4 hour workshop, an additional meal, an even bigger gift tote, more chances to win giveaways and a bonus 'message in a bottle' craft project kit - plus a discount for buying the full day pass. $150
  • For the entire glorious pampering weekend, you'll get six 4 hour workshops, a supersized gift tote, 6 delicious meals and 4 bonus art and soul experiences - a guided meditation, the 'message in a bottle' project kit, a henna painting workshop and our exclusive nametag project with collectible and tradeable meaning-filled charms. $450
Click here to register for any of these options.

I will be teaching my workshop on Sunday morning, November 13th.  The focus will be bridging the gap between a past dream/accomplishment you've already achieved and one that you hope to achieve in the future.  We will be creating two layouts using beautiful Prima products and some other shabby chic "accoutrements" from my vintage stash.  There will be lots of layering and texture, and you'll have several options for altering the embellishments to make them your own.  We'll be playing with mists, ink, chalk and glitter (plan to get a little messy!).  Here are the layouts we'll be working on in class:


Hidden journaling:

Thank you Prima and Creating Keepsakes Magazine for your sponsorship!  Other products we'll be using in my workshop include Fancy Pants, EK Success, American Crafts and Clearsnap.

It costs only $80 for my four-hour workshop, which includes over $45 in product, plus a gift bag and a delectable breakfast.  Here's the link to the registration page.  I hope you'll join me at this amazing event! 

Monday, October 31, 2011

Happy Halloween

Happy Halloween everyone!  There was a Halloween festival at my girls' school this past Friday.  The kids all had fun dressing up and showing off their costumes.  One thing I found interesting is how the costumes evolve as the girls get older.  In Danielle's 2nd grade class, it was all about looking pretty.  There were some angels, fancy devils (Danielle), rock stars, brides, a couple princesses, etc.  But in Rebecca's 4th grade class, it was all about being spooky, macabre and bloody.  Rebecca was a bloody vampire.  Among the other girls in her class, there was "zombie" everything -- zombie bride, zombie waitress, zombie prom queen, zombie skeleton, zombie clown . . . you get the picture.   Times have changed since the days of the Cinderella and Tinkerbell costumes they loved in Kindergarten.  Sigh.

I have a couple Halloween projects to share.  First up is a mask I made using some of Prima’s new Halloween goodies. A black glitter-coated mask will provide for the perfect disguise when the ghosts and goblins come a-calling.


Prima supplies used:
553760 Bat Vine
553296 Coventry Rose
551360 Say it in Crystals
552800 Carlotta Royale
538620 Fairtytale Roses (colored with purple mist and glitter)

No witch would be properly dressed without a pair of shoes like these:


I made these using a paper shoe template I created a while back. You can find the tutorial and link to the template on my blog here: paper shoe template.  I altered the template slightly to make these shoes a bit pointier . . . perfectly fit for a witch!

Prima supplies used:
841713 Paisley Road “Assam”
551360 Say it in Crystals
553548 Autumn leaves
553777 Night Flight bats

Have a safe and fun Halloween!!

Thursday, October 20, 2011

Prima projects

Hi friends!  Today I have a couple Prima layouts to share.  If you follow the Prima blog, these might look familiar since I posted them there when I was featured last month.  I'm way behind on posting my projects here on my own blog.  In fact, I still have Summer CHA projects that I haven't shared yet.   Soon, soon.

This layout features papers from the lovely Pixie Glen collection. 


I love that there is a paper in each collection with journaling spots. I used one of the journaling spots and the mini alpha stickers to create a hidden journaling pull tab.


I decided to play around with something a little different on this layout: candle wax! I lit a sea-blue candle and let the hot wax drip onto my paper. I added some droplets of spray ink to compliment the wax color. If you try this at home, be careful with the flame and hot wax! 
Products used:
843229 Pixie Glen "Cornwall"
843212 Pixie Glen "Devon"
843168 Pixie Glen "Window View"
843205 Pixie Glen "Rose Arbor"
550172 Alphabets - Pixie Glen
550073 Alphabet Stickers
551360 Say it in Crystals
551841 Crystal Palace - Starburst

This next layout features a picture of me and brother when we were little. The Romantique line is perfect for these vintage looking layouts. Eeeks . . . I think I just called myself vintage. 

I cut out the image of the lady and flowers from one corner of the Romantique "Hilary" paper, then I flipped the remaining piece of paper over, cropped it, and adhered the lady with 3D pop dots to the reverse side (covering the missing spot).

I painted the edge of the Romantique paper with gold paint, then I mounted the paper on cardstock and crocheted a delicate border around the outer edge.

Products used:
843427 Romantique "Hillary"
551223 Romantique Chipboard
550097 Romantique Alphabets
553470 Medley Copper
551704 Fleur De Lys - Almond
552503 Avon Rose - Romantique
552695 Sherwood Rose - partridge

Thanks for stopping by! Have a great weekend!

Thursday, October 13, 2011

Budget-friendly flowers

Here's a two-page layout that I created for a Creating Keepsakes "Budget Tips" article about using everyday items to create page accents. 

As seen in the Creating Keepsakes' Scrapbooking Tips & Tricks: Fabulous Flowers, 2011.  Copyright Creative Crafts Group.  Posted with prior permission from the publisher.

I created the flowers using ink-colored cupcake liners for the petals, a glittered metal washer for a glammed up center, and alcohol ink-stained leaves that I cut from a coffee can lid. 


Take a look around your house and see what items you can find to create some fun accents!

Friday, October 7, 2011

Just 5 more weeks . . .

Just 5 more weeks until the CRAFT Beach Retreat on November 11 - 13!   I'll be teaching at the event along with these very talented ladies: Amy Tan, Ly T. Le, Linda Barber, Paige Evans and Rachel Kaufman. I have all the lovely Prima products in my hands and I'm in the process of creating the layouts for my workshop.

The title of my two-layout workshop is "Bridging the Gap".  The first layout will be about a past accomplishment and the second layout will be about a dream or a goal you have for the future.  It will prompt you to see how the skills you developed in reaching your past goal can be used to reach your future goal.   We'll be working with Prima's Romantique and Printery lines to create layouts full of texture, dimension, and lots of feminine touches.  You'll get to play with a variety of mists, inks, chalks and glitter.  There are still a few spots left at the event, so I hope you'll join me!

This unique event follows the approach of Scrapbooking from the Inside Out ("SFTIO").  It's the idea of using scrapbooking as a form of self exploration, self expression, and self discovery. The result is meaningful pages and projects that reflect who you are, both inside and out.

I recently got to play with one of SFTIO's gorgeous monthly kits:  the "Growth" kit.   I created a layout that will give you an idea of the concept behind SFTIO and the CRAFT Beach Retreat.


The "Growth" prompt got me thinking about growing older.  The journaling talks about how I'm not as concerned about getting more wrinkles or grey hair (thankfully there's Botox and hair dye to the rescue!), but rather the fact that as time marches, life as I know it right now will inevitably change.  My kids will get older, my parents will age, people will move on, etc.  But that reminds me that I need to sit back and enjoy the "now" and appreciate all the gifts I have today.   Living in the present and not fretting about the future is what I consider growing old with grace.

Enjoy your day!!