javascript:void(0)

Tuesday, October 5, 2010

101+ Creative Ways to Use Your Scrapbook Supplies + a Giveaway!

Creating Keepsakes has a new special issue out:  101+ Creative Ways to Use Your Scrapbook Supplies.

This special issue is chock full of great ideas. It features inspiring ideas from Creating Keepsakes columnist Jennifer McGuire and a team of talented scrapbookers. They will show you how to go beyond the basics to use your supplies in new ways to create unique page accents, backgrounds and more. With budget-saving tips, easy techniques, ideas for leftovers and more, the useful ideas in this issue will help you stretch your dollars and make the most of your supplies. 
I was honored to be asked to contribute a few projects to this special issue. Here's a peak at one of them:

I've already received my copy of this issue, and I can tell you that it's FANTASTIC!!  You can purchase it here:  101+ Creative Ways to Use Your Scrapbook Supplies.  Use code FS101B to get free shipping on orders of $25 or more, now through December 31, 2010.  You can also find this issue on newstands.

And now for the giveaway!  Creating Keepsakes is allowing me to give away a copy of this special issue to one of my blog readers.  Just leave a comment here from now until the end of the day on Saturday, October 8th and I'll draw the name of the lucky winner. I'll post the winner next week!

Friday, October 1, 2010

Happy Friday!

I'm blogging right now so I can put off doing the inevitable . . . cleaning the huge MESS in my scrap room.  I could swear that I had a scrap table in there somewhere, but there's so much stuff piled up  that I can't even see it!  I've been scrapping non-stop for the last couple of weeks, so things have been piling up . . . and piling . . . and piling.

I'm still trying to play catch up posting layouts I've done during the past few months.   Here's one I made for the Prima booth at CHA.  I cut off part of the 12 x 12 paper because I wanted the circle and photo to hang over the edge . . . as if the girls are running off into the floating ocean.


I used Prima's Jack and Jill line and some of the other new products.

On another note, I'm THRILLED to be a Guest Designer for My Creative Scrapbook this month!   The kits are absolutely gorgeous!  I got to play with the Main Kit this month, and I loved every single thing in it.   Here are some sneak peaks of my layouts.


The October kits will be revealed on My Creative Scrapbook on the 5th, and after that I'll be posting my full layouts here.

Monday, September 27, 2010

Happy Monday!

I've been having so much fun playing with the beautiful and adorable Dusty Attic chippy pieces as part of my Guest Designer stint with them this month.  Here's a layout I created using Dusty Attic chipboard mini houses, an ornate frame, and a mini word ("family").

Have I mentioned how much I love these chipboard products?  They are so versatile -- you can paint them, ink them, chalk them, spray them, or just leave them as is!   I painted the ornate frame with Shimmerz paint, and I inked the word "family".  I painted the chipboard houses with acrlyic paint then coated them with Glossy Accents. 

I crocheted around the edge of the paper to give this family page a homespun feel.   I found some great vintage crocheted  doiles at an estate sale recently, and I've been having fun dying them different colors with Shimmerz Spritz and Vibez:
I made a little puffy heart to go over the Dusty Attic chipboard title:

That's it for today, but I still have lots of other layouts to share.  Have a great Monday!!!

Wednesday, September 22, 2010

Up, Up & Away

I admit it . . . sometimes I plan events and clothing around my scrapbook page ideas. I might get some beautiful new paper and think, "hmmmmmmm, the girls' new dresses would look perfect with those colors," and then I'll have them wear the dresses for an impromptu photo shoot.   That's what happened when I received Prima's fun new travel-themed Road Trip line.  We had scheduled our annual "girls only" vacation (just me, my mom and my girls) to San Francisco a couple weeks after that, and I knew that I'd have an opportunity to take some airplane photos.  Since the colors in this line are green, blue and brown, I "encouraged" my girls to wear matching colors for the plane ride.  Okay, okay, maybe I did more than encourage them.  I think there might have been some gently coercion and bribing involved. :)

 This layout was based on Prima's September Build-a-Page.  Here's a close-up.  See how their shirts and pants match the papers and lace perfectly?  Hehehehehehe.

I'm very honored because this layout was selected as the Featured Project of the day on 2Peas today!!

Thank you, 2Peas!

Monday, September 20, 2010

Grandparents

Happy Monday everyone!  I have a few layouts to share today.  The first two layouts were part of an article entitled the "Lighter Side of Grandparenting" in the September issue of Creating Keepsakes magazine.  I have wonderful parents in my life:   my mom and stepfather and my dad and stepmother.  They are all good friends, and that makes for a nice, big happy family.  I'm very fortunate that they all live close-by and that they are very involved in my girls' lives.   We are very blessed!

My dad is such a fun-loving guy who would do anything  for his grandchildren.  This layout shows pictures of my daughter, Rebecca, painting his fingernails at a "day of beauty" party.  What sport!   A little while after that he let Danielle put eyeshadow and blush on him (I'm saving those priceless pictures for another layout).

Here is my mom giving my girls a little sewing lesson:

Last but not least, this layout was in the "Back to School in Style" feature.  I used a real wooden ruler and a Number 2 pencil on this page:
As seen in the September 2010 issue of Creating Keepsakes magazine. Copyright Creative Crafts Group. Posted with prior permission from the publisher. 

Have a fantastic week!!

Thursday, September 16, 2010

Fixed! {I hope}

If you happened to see my blog post about an hour ago, you know that I was in tears because I had managed to delete ALL my blog settings, including the headers, background, fonts, widgets . . . everything!!!  I've spent a good part of the day dealing with this, and luckily I've gotten the main elements back to the way they were.  It all started a couple days ago when I tried to get help adjusting the margins slightly, but those changes made my blog look wonky, so I tried to go back to the way I had it in the first place.   Then  "POOF" . . . all gone.  I should have left well enough alone, because even though I have the main settings back, my margins are more scrunched now -- worse than the way I had it before.  It's been a very frustrating few hours dealing with this.  Now I need to go eat a cookie and scrap for a while. Scrapping is always my best medicine!!

So that you haven't completely wasted YOUR time coming here today, here's a Lily Bee layout to share. 


To create the background, I did a little masking technique using the Lily Bee chipboard stickers and Shimmerz Vibez. I simply placed the chipboard stickers on a sheet of cardstock (without removing the protective sticker backing), then I sprayed over the chipboard pieces with Shimmerz Red-Y Or Not Vibez. 

After I removed the chipboard stickers, I outlined the shapes with Stickles for a little extra definition.
I colored the lace doily with Blue Jeans Vibez.   And see those little leaves?  I made them out of really cool air dry modeling compound called Delight.  The modeling compound is white, and you can either mix paint in before it dries or paint it afterward.   For these leaves I chose to paint them with Shimmerz paint after they were dry.


Now I'm going to step.away.from.the.computer. Argggggh!!!

Wednesday, September 15, 2010

Back to School

My girls went back to school a couple days ago.  While it's nice to have more time to get things done during the day, I will miss the lazy days of summer that I spent with my girls.  We had a wonderful time just hanging out and being together.  My favorite part of the summer was our morning routine.  The girls would wake up early and go quietly into our den and watch TV.  I would wake up shortly after them, and when I came into the den they would jump up off the couch and run to me yelling "Mommy, Mommy, Mommy!" and then they would give me a BIG 'good morning' hug.   They had a little competition every morning to see who could get to me and hug me first (hehehehe . . . sometimes it's nice to be fought over).   Then we would have a nice leisurely breakfast before venturing out for the day.  It was such a great way to start each day!

Here are a couple pictures from the first day of school:


Now that the girls are back in school, our morning routine is a little different.  We all wake up very early so that we can make it to the school bus stop on time.   One GREAT thing is that my girls are FINALLY in the same school this year.  Last year they were in two different elementary schools, and their often conflicting  schedules made for a very chaotic year.  Now that they are both on the same early start and late pick-up schedule, I have a couple extra hours during in the day.  And on days like today when my husband drives them to the bus stop, I get to stay in my pj's for a while.  Shhhhhhhhhh . . . don't tell anyone, but it's noon and I'm still wearing my pajamas and fuzzy slippers!!  I almost don't know what to do with myself now that I have extra time during the school day!  Luckily my job as an insurance agent affords me the luxury to work from home when I want to.  And the extra hours mean that I'll be able to do some scrapping during the day.    Woo hoo!

Friday, September 10, 2010

Prima Road Trip and a Warehouse Sale

I still have bunch of Prima CHA projects that I haven't posted here yet.  My blogging hasn't quite caught up to all my scrapping over the last couple of months, so I'm trying to play catch up.   Here's a layout I made with Prima's fun new Road Trip line:


And here's a card that I made to look like a little suitcase (I had a lot of fun making this one!!):
The inside:

Do you need to stock up on some Prima goodies?  Prima has a Virtual Warehouse Sale going on right now!  There are 6 different boxes to choose from, and each box is packed with Prima products at wholesale pricing. There's a photo of what's inside of each box so you know what you're getting.  And if you use the promo code POM, you'll get a 6 by 6 paper pad from one of the new releases -- Annalee, Fairy Flora, Jack and Jill, Paisley Road, Road Trip or So Cute.

Monday, September 6, 2010

Dusty Attic Guest Designer

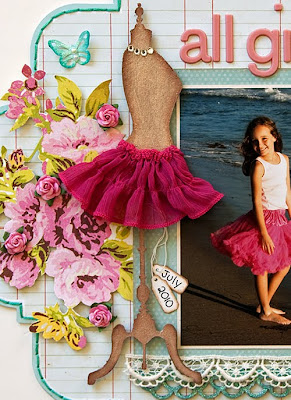
I was so honored to be asked to be a Guest Designer this month for Dusty Attic, an Australian company that makes the most beautiful laser cut embellishments.    I loved the Dusty Attic products the first time I saw them online, and when I got them in my hot little hands last week, I went gaga and couldn't wait to start creating.  Here's my first layout with one of the Dusty Attic dress form shapes (they have a few different styles) and the scalloped border.

The beautiful paper is from Girls' Paperie.

I painted the Dusty Attic dress form with Gold Glimmer Shmmerz Blingz.  I painted the scalloped chipboard border with Under the Sea and Aqua Marine Shimmerz, then I added a little glitter on top. 


I seriously LOVE these Dusty Attic products.  To all the US online scrapbook stores:  Would you please get these products in your stores???  Pretty please with sugar on top?  I will definitely need a regular supply of these beautiful embellishments in the future!

I'll be creating and posting more Dusty Attic layouts in the coming weeks.   Other guest designers for July and August include Danielle Flanders, Donna Salazar and Cari Fennell, plus Dusty Attic has a very talented Design Team, so there's lots of eye candy to see in the Dusty Attic gallery.  Thank you, Dusty Attic for having me as your guest this month!

Thursday, September 2, 2010

Bowling

I'm trying to make the most of the last days of summer before my girls go back to school.   Today we went bowling.  That might sound boring to some people, but not to us!  We all had a ball (no pun intended!) the last couple of times we went bowling.  Can you believe that my 8-year-old daughter beat me in a game today?!?   And she got two strikes in a row!  Not bad considering she has only bowled twice before.  She was so proud of her double strike, and it made me happy to see her take pride in her accomplishment.  You go girl!  Silly me . . . I didn't take any pictures today (though I do have some unscrapped pictures from the last time we went bowling).

On to scrapbooking . . . Here's a layout that was recently published in Creating Keepsakes. There are lots of Prima goodies on this one. I sprayed the Prima canvas paper with Sea Foam Shimmerz Spritz and I colored the Prima flower with Shimmerz Ruby Spritz.

As seen in the July/August 2010 issue of Creating Keepsakes magazine. Copyright Creative Crafts Group. Posted with prior permission from the publisher. 

Thanks so much for stopping by!

Friday, August 27, 2010

A couple layouts to share . . .

I'm anxiously waiting for my nice postal lady to bring me all the new Lily Bee goodies from the recent CHA release, but in the meantime I've been playing around with some of the great collections from the last release.  I just adore Lily Bee's "Lovely" line . . . it's one of my all-time favorites.  The picture was taken on my birthday, and the journaling talks about how my birthdays with my girls are so much sweeter than any birthday's I ever had before becoming a mommy (not that those birthdays weren't fun too).  My girls are like icing on my birthday cake!

I learned this great little paper quilting technique from a tutorial by Davinie Fiero.  I used Pop-Art Pink and Ruby Shimmerz Spritz to color my handmade fabric flower. I painted the base of the cupcake with Chocolat Shimmerz paint. 

It's hard to believe that summer is almost over.  Though thanks to severe budget cuts in our local school district, my girls don't back to school for another couple of weeks.  Yay!!  Two more weeks of summer!  Going swimming at my parents' house is one of our regular summer activities.  I have a gazillion swimming pictures from the last 6 or 7 years.  The picture in this layout was taken in 2005 (I don't scrap chronologically, obviously).


I used a sheet of lace cardstock as a mask with Shimmerz Spritz and Vibez to create the background:

Have a wonderful weekend!

Friday, August 20, 2010

Her Laughter

My daughter, Rebecca, has one of those infectious laughs that makes you laugh right along with her.  It's a very hearty, joyous, 'all-is-right-in-the-world' kind of laugh.  I can still remember the first time Rebecca laughed -- really laughed -- when she was a baby.  My dad was making funny faces at her (with googly eyes and full sound effects like only grandpas know how to do), and she broke into uproarious laughter.  With each googly face he made, Rebecca laughed harder and harder.  Her laughter was so powerful that she scared herself and started crying (awwwwww!).   But she soon learned that laughter is a wonderful thing, and she's been laughing ever since.  And I've been laughing right along with her!

Here's a layout featuring a picture of her laughing when she was about 3 years old (she's 8 now).  This is one of my favorite pictures of her, and I finally got around to scrapping it.

This page is based on Prima's August Build-a-Page.  I used papers from Prima's Flights of Fancy and Raspberry Tea collections, along with lots of other Prima goodies.  The patchwork squares were inspired by a similar patchwork design that I saw on a layout by Jenni Hufford. I couldn't resist adding a little bit of crocheting!

Thanks for stopping by!!

Monday, August 16, 2010

Prima layout and paper rose flower tutorial

Hi there! As you can probably tell from looking at my layouts, I have a "thing" for flowers.  I love Prima flowers (of course!), but I also like to make paper roses. Earlier this year I was asked to make a layout with these paper roses for Scrapbooking m.m., the beautiful Swedish magazine.  This layout was published in the May/June issue.  It features a picture of me and my sweet hubby on our wedding day:

Almost everything on this page is Prima.  I used Shimmerz Spritz to color the lace and I painted the Prima patterned paper with a bit of Shimmerz paint to make the colors really pop. 

Here's a close-up of the paper roses:

The editor asked me to put together a step-by-step tutorial for the magazine article, so I thought I would share the tutorial here too.  But first, I have to give credit where credit is due.  I know there are different versions of this rose tutorial on the internet, but I first learned how to make them from a tutorial I saw on Maria's blog (I tweaked my version slightly).  We made sure to credit Maria in the magazine article too.   Thank you, Maria!

Here's the "how to":

1. Punch out three flowers using a 6-petal flower punch.  Of course you can also use a die-cutting machine to cut your flowers.  Fold them along the petal lines as shown.

2. On the first flower, cut a slit down the side of one petal to the center (do not cut off any petals on this one). On the second flower, cut off two petals, and on the third one cut off two petals. Optional: ink the edges of the petals.

3. Fold the flowers into a cone shape and snip off the bottom point so that your flowers won’t be so bulky.

4. Put a little glue onto one of the petals of each of the three flowers and glue one petal over the other as shown.

5. Now you will have the first three outside layers of your rose.

6. Using the handle of a paintbrush, curl the edges of the petals back. For a tighter curl, you can use a toothpick.

7. Your layers should look like this:

8. Stack the three layers in order of size with the biggest one on the bottom, and adhere the layers to each other with glue. Now you are ready to make two inside petal layers.

9. For the second-to-the-last layer, take your 2-petal piece and curl the petals back with the paintbrush handle (or toothpick) like you did with the big petals. Wrap it around itself in the shape of an ice cream cone. Leave it somewhat loose because you are going to be inserting the final petal in the middle. Cut off the bottom point.

10. For the final inside petal, take the one petal piece and curl back the edge, then wrap it around itself tightly.

11. Snip off the edge, and insert it into the 2-petal piece you just completed. Add these final pieces to the center of your rose, adhering them in place with a dab of glue.And there you go . . . a beautiful rose!!!
Give it a try!!

Saturday, August 14, 2010

Family Photo Shoot


A few years ago we found the most amazing photographer here in Los Angeles, Melissa Walker-Scott with Lullaby Photography.   Every summer we schedule a family photo shoot with Melissa, and the results are always fantastic.  Melissa knows how to work magic with her camera! Here are some of the pictures from our photo shoot a couple weekends ago:


Melissa doesn't mind if I bring my camera and shoot some photos along with her (though mine never turn out nearly as good as hers).  Here are a couple I took with my camera:
 

Melissa took many more fantastic photos that day, so I'll definitely have lots of great pictures to scrap in the coming months.  Thanks Melissa!!